How to Migrate a Website to a New Host Without Downtime
Learn how to migrate website to new host without downtime. Follow practical steps for backups, files, databases, DNS, testing, email, and final setup.
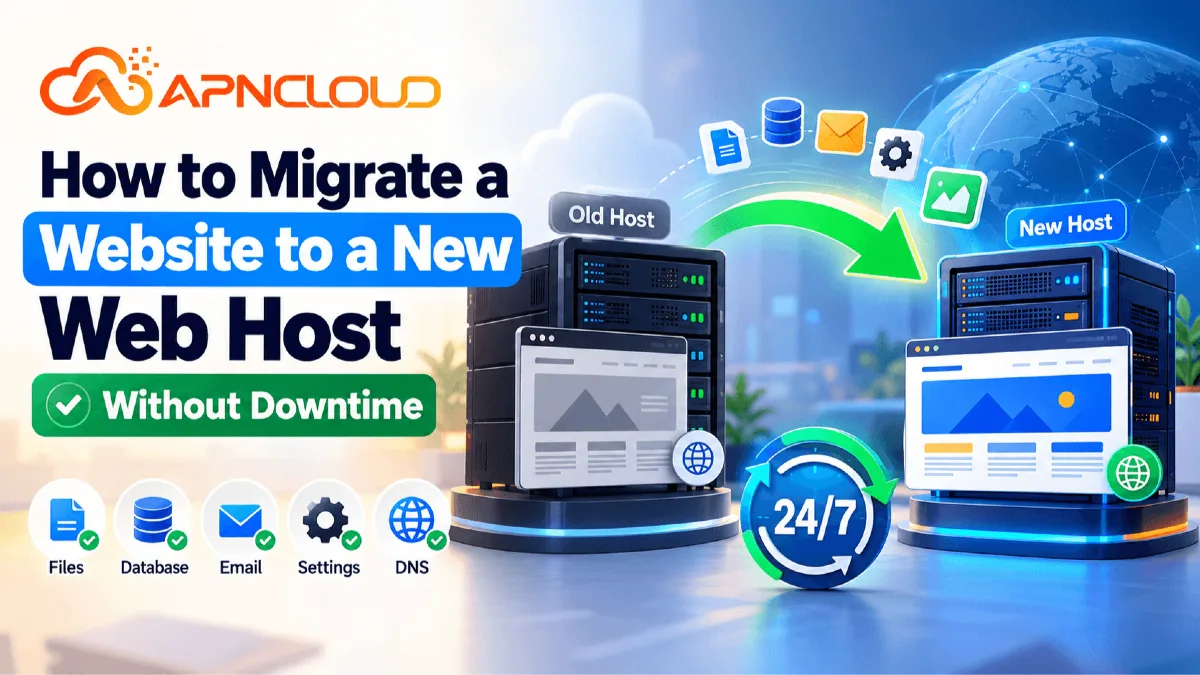
Moving a website from one hosting provider, to another can seem dangerous especially when the website is already getting visitors making sales taking orders sharing content or running a business. New people often fear that switching hosts will make their site go offline for a hours mess up their database delete their email accounts create SSL problems or hurt how well their site shows up in search engines. Fortunately, a properly planned migration can avoid most of these problems. If your goal is to migrate website to new host with little or no noticeable interruption for visitors, the key is to treat the migration as a controlled copy-and-switch process rather than immediately cancelling the existing hosting account. Your old website should continue serving visitors while you prepare an exact working copy on the new server.
Only after the new version has been copied, configured, tested, secured, and confirmed to work correctly should the domain's DNS records be changed. This overlap is what makes a near-zero-downtime migration possible. The basic principle is simple: keep the old hosting online, build the new environment privately, test everything, synchronize any last-minute changes, update DNS, and continue operating both environments until the transition has stabilized. This process works for many WordPress websites, company sites, blogs, portfolios, landing pages, and other standard websites, although highly dynamic stores, membership platforms, forums, SaaS applications, or websites receiving constant database updates may require additional synchronization planning. Before starting, it is helpful to understand how domains, hosting servers, DNS, files, and databases work together.
Beginners can first review APNCloud's What Is Web Hosting? A Complete Guide for Beginners to understand the basic relationship between a website and its hosting environment. Remember that changing the hosting provider does not normally require transferring the domain registration at the time. The domain can remain registered, with its registrar while the DNS points to a completely different hosting server. This separation makes migration safer because the focus can stay on moving the website. In this guide I will walk through preparation, backups, file migration, database transfer, email considerations, private testing, DNS changes, monitoring, common mistakes, a final migration checklist and asked questions. The objective is not to promise that every technical environment can achieve perfect zero downtime. Instead the goal is to prepare the server before the public switch so normal visitors experience little or no interruption while the website moves to the new hosting environment.
Why Migrating a Website to a New Host Without Downtime Matters
Hosting migration is more than copying a few website files from one server to another. For a website hosting sits beneath almost every visitor interaction. Mistakes during hosting migration can affect website performance, email delivery, forms, customer accounts, database records, SSL certificates, scheduled tasks, analytics, integrations and search‑engine accessibility. Imagine that a business website normally receives customer enquiries throughout the day. If the owner deletes the hosting account before confirming that the new server is working visitors may reach an error page instead of the website. From my experience hosting migration can feel like a tightrope walk. An ecommerce business faces a more complicated situation. Customers may be registering accounts creating carts, placing orders submitting payments or changing profile information while files and databases are being moved. That is why a careful hosting migration attempts to eliminate the gap, between the environment and the new one.
There are legitimate reasons to change a hosting provider. Your current hosting plan might no longer provide CPU, RAM, storage, bandwidth, database capacity, email functionality, support, security features or upgrade flexibility. Your website may have grown beyond an entry‑level shared hosting environment. You may simply want modern storage, better administration tools, easier backups, a different control panel improved technical support or a clearer upgrade path. If you are still deciding whether you need ordinary shared hosting or additional server resources, APNCloud's Shared vs VPS Hosting: Which Hosting Is Right for Your Website? explains the practical differences between the two environments. Website owners should nevertheless avoid migrating simply because another hosting plan displays one impressive specification. Website performance depends on a combination of hosting resources, storage, software configuration, caching, databases, application code, themes, plugins, third-party services, images, and traffic patterns.
A migration is therefore a good opportunity to review the entire hosting requirement instead of simply copying an inefficient setup to another server. You should identify how much disk space the current account uses, which PHP version is required, what databases exist, whether cron jobs are running, how many email accounts are hosted, which DNS records are active, whether the website uses external APIs, and whether there are applications outside the main public website directory.
A well-planned migration also protects you from another common problem: discovering important dependencies after DNS has already been changed. If a contact form depends on a specific PHP extension, a payment integration requires a callback URL, or an application expects a particular server path, finding that issue during private testing is much safer than finding it after customers reach the new server. Treat migration as a controlled infrastructure change. The old server remains your temporary fallback while the new server is prepared. When both environments are available simultaneously, you have time to compare them, correct differences, and reverse the change if a serious problem appears. That preparation is what turns website migration from a stressful emergency into a manageable technical process.
Step-by-Step Guide to Migrate Website to New Host Without Downtime
Step 1: Audit Your Current Website and Create a Migration Plan
The safest way to migrate website to new host begins before you upload anything to the new server. Start by making an inventory of everything connected to your current website hosting account. Record the main domain, subdomains, addon domains, aliases, website directories, databases, database usernames, email addresses, forwarding rules, autoresponders, DNS records, SSL certificates, cron jobs, PHP version, PHP extensions, redirects, security rules, caching configuration, application versions, and any third-party services connected to the website. WordPress users should document the WordPress version, theme, active plugins, caching plugins, security plugins, backup tools, SMTP configuration, and any custom code installed through the theme or plugins. If you operate a custom PHP application, confirm its required PHP version and extensions.
If the website uses Node.js, Python, Redis, command-line jobs, queues, special database functions, or other application services, verify that the destination hosting environment supports them before migration begins. Next, check how much storage is actually being used. Do not look only at the maximum disk allocation of your current plan. Check the real size of website files, databases, emails, logs, backups, and other directories because you need enough capacity at the new host for both existing data and reasonable growth. You should also identify periods of low activity. A basic company website might be migrated at almost any time because its content changes infrequently, while an online store that receives orders every few minutes requires much tighter scheduling and database synchronization. If possible, perform the final synchronization and DNS cutover during a quieter business period, but do not take the old site offline simply because you are migrating. Another useful preparation is to review the DNS Time to Live, commonly called TTL. TTL influences how long DNS resolvers may cache a record before checking for updated information.
If you control the DNS zone and the current value is relatively high, reducing the TTL ahead of the migration can help updated records become visible sooner when you later change them. Do not change nameservers or delete existing DNS records at this stage. Your purpose is only to prepare. Finally, decide what successful migration means. Create a simple list of critical functions such as homepage loading, login, registration, checkout, search, contact forms, image loading, SSL, email, API connections, admin dashboard, mobile layout, and scheduled tasks. This becomes your test plan after the new copy is ready. If you are moving because your existing hosting no longer fits your requirements, it is worth reviewing APNCloud's How to Choose the Best Web Hosting for Your Website in 2026 before selecting the destination plan. Choosing a suitable environment before starting is far easier than discovering halfway through a migration that the destination server lacks a required resource or feature.
Step 2: Prepare the New Hosting Account Before Moving the Live Website
After documenting the existing setup, prepare the destination hosting environment while the original website continues to operate normally. Your new hosting account should be fully provisioned before you touch the live configuration. Start by confirming the server details supplied by your new hosting provider, including the server IP address, control-panel login, temporary hostname or preview method, nameserver information, file-management access, FTP or SFTP credentials where applicable, database tools, supported PHP versions, SSL options, email configuration, and backup facilities. Do not point your public domain to the new server yet. You should first recreate the environment needed by your application. For a WordPress or PHP website, select a compatible PHP version, enable the necessary extensions where the hosting interface allows it, create the required database, and confirm that the web root is ready.
If your old hosting account contains custom .htaccess rules, redirects, cron jobs, subdomains, or special directory permissions, make a note of these because copying only the visible pages may not recreate the complete application. When moving between different control panels, features may have different names or workflows. For example, a setting that existed under one section of the old control panel may be managed differently on the new hosting platform. Instead of assuming both environments are identical, compare them function by function. Security is another important part of destination preparation. Use new, strong passwords for the new control-panel account, database users, SFTP or FTP accounts, and administrative credentials when appropriate. Enable multi-factor authentication where it is available.
Confirm how SSL certificates will be issued once DNS points to the server, and avoid permanently disabling HTTPS simply because the certificate cannot yet validate against the public domain. You should also check backup functionality. The migration copy itself should never be your only backup. Keep an independent copy of the existing site before making changes. If you are considering APNCloud as the destination hosting environment, its current website lists NVMe storage, DirectAdmin, free SSL, automated daily backups, and support among the features available across relevant hosting services; specifications should always be checked against the particular plan you intend to purchase because resources differ by plan. For a normal small business site or blog, shared hosting may provide enough resources and keep administration simple.
Larger or more resource-intensive applications may need VPS-level resources or another solution. APNCloud's Best Web Hosting for Small Business: What Should You Look For? provides additional guidance on choosing resources for business websites. Once the destination account is configured, resist the temptation to change DNS immediately. The next objective is to build a complete private copy and test it independently. The public site should continue using the old server until the destination passes your migration checklist.
Step 3: Create a Complete Backup and Transfer Website Files Safely
Before copying the site, create a complete backup of the current hosting account or at least every component required to restore the website. A dependable migration backup normally includes website files, hidden configuration files, database exports, uploaded media, application configuration, email data when email is being migrated, cron-job details, DNS records, SSL-related information when needed, and a record of important server settings. WordPress websites usually contain core WordPress files, themes, plugins, the uploads directory, and the wp-config.php configuration file, but you should back up the complete website directory instead of selecting only the files that appear important. Hidden files such as .htaccess can contain redirects, access rules, rewrite settings, or application behavior that is easy to overlook.
You can create backups through your hosting control panel, a migration tool, a WordPress backup plugin, command-line tools if supported, or manual archive and database-export methods. Whatever method you choose, verify that the backup completed successfully and, whenever practical, download an independent copy to a safe location rather than leaving the only backup on the server you are about to move away from. Once the backup is secure, transfer the website files to the destination server. A control-panel backup-and-restore process may be the easiest solution when both environments support compatible account backups. Otherwise, files can usually be compressed into an archive, transferred to the new account, extracted into the correct document root, and given suitable ownership and permissions. SFTP or another supported secure file-transfer method can also be used for manual migrations. Very large sites may be more efficient to transfer server-to-server when the hosting providers support an appropriate migration method.
After extraction, verify the directory structure. A surprisingly common mistake is placing the website one directory too deep—for example, extracting an archive so the public files end up inside /public_html/backup/public_html/ rather than the actual public web directory. Check that important hidden files were copied and that media folders contain the expected files. Do not delete the source files after copying them. Remember that migration is initially duplication, not relocation. The original server remains the active production website until the final DNS change has been completed and verified. You should also avoid making unnecessary application upgrades at the same time as the migration. Updating WordPress core, changing a theme, replacing plugins, upgrading PHP several versions, reorganizing URLs, and changing hosts simultaneously creates many variables.
If something stops working, you will not know whether the cause was migration, software updates, or server compatibility. Unless an update is necessary for compatibility or security, migrate the existing working application first and perform major changes separately after the website is stable. The purpose of this stage is simple: create a faithful copy of the currently working website on the new hosting environment while preserving a known-good source and an independent backup that can be restored if anything unexpected happens.
Step 4: Move the Database, Email, and Important Configuration Correctly
Website files are only part of most modern websites. WordPress, ecommerce systems, content-management platforms, forums, membership sites, and custom applications normally store important information in a database. That database may contain pages, posts, user accounts, settings, products, orders, comments, application configuration, and other information that cannot be reconstructed simply by copying files. Export the database from the old host using an appropriate database-management interface or backup system, create a destination database and user on the new host, import the data, and update the application's database configuration with the new database name, username, password, and hostname if those values differ. WordPress users normally check these details in wp-config.php; other applications store them in configuration or environment files.
Do not blindly replace text across an entire WordPress database because WordPress and plugins can store serialized data that may be damaged by unsafe replacements. If the site's domain remains unchanged, a broad URL replacement is usually unnecessary just because the hosting server changed. After import, confirm that database tables are present and that the application can establish a connection. Dynamic sites need additional attention because visitors may continue changing the database while you perform the migration. Suppose you copy an online store database at 2:00 p.m., spend three hours testing, and switch DNS at 5:00 p.m. Orders placed on the old site between 2:00 and 5:00 may not exist in the database copy created earlier. For frequently changing websites, plan a final database synchronization close to cutover. Depending on the application, this may involve a short maintenance window for write operations, application-level replication, selective synchronization, or another migration process supported by your platform.
A short controlled restriction on new changes is often safer than silently losing orders or customer data. Email requires similar planning. If your email is hosted on the same account that you are leaving, inventory every mailbox, forwarder, autoresponder, filter, and relevant DNS record. Decide whether email will remain with a separate provider or move to the destination server. MX, SPF, DKIM, DMARC, and other email-related DNS records should not be casually removed when website DNS is changed. If you use Google Workspace, Microsoft 365, another external mail platform, or dedicated email hosting, changing the website's A record may not require changing those mail records at all.
This is why documenting the DNS zone during Step 1 matters. Also recreate scheduled tasks, redirects, subdomains, custom error pages, environment variables, API credentials, storage paths, webhooks, and other configuration the application depends on. Sensitive credentials should be transferred securely rather than pasted into public notes. By the end of this stage, the new server should contain the website files, functioning database, required configuration, and any related services necessary for the site to behave like the original. The public domain should still be serving the old server until private testing is complete.
Step 5: Preview and Test the New Website Before Changing DNS
Testing before DNS cutover is the most important practical difference between a careful migration and a risky one. You need a way to open the website from the new server while ordinary visitors continue reaching the old server. Depending on your hosting provider and application, this may be possible through a temporary URL, staging address, development subdomain, server preview system, or a local hosts-file override on your own computer. A hosts-file override can make your computer resolve the website's normal domain name to the new server IP without changing public DNS, which is particularly helpful when applications depend on their real domain name. Use whatever testing method your hosting environment supports, but make sure it does not accidentally expose a duplicate indexable copy of your website to search engines.
Once you can privately open the new version, test far more than the homepage. Visit important pages, blog posts, categories, images, downloads, login screens, forms, search functions, user dashboards, contact pages, and administrative areas. If you operate an online store, test product pages, categories, cart actions, checkout workflow, account pages, tax or shipping calculations where applicable, and payment-gateway configuration using supported test or sandbox functionality when available. Do not make unnecessary real purchases merely to check the migration. Verify that internal links work, images are loading from the intended server, CSS and JavaScript files return normally, and browser developer tools do not show obvious missing resources. Check PHP errors and server logs for warnings that may not be visible on the page. Confirm that application URLs are correct and that no resources unexpectedly reference a temporary migration address. Next, check HTTPS behavior. Before public DNS points to the destination server, automatic certificate issuance may depend on the host's validation method, so follow the hosting provider's SSL procedure.
Once the certificate is active, verify that the website loads over HTTPS without mixed-content warnings. Performance should also be compared. Migration does not automatically fix an inefficient theme, oversized images, poor database queries, or too many third-party scripts, but a new hosting environment should at least operate correctly under its intended configuration. Check caching, compression, PHP version, object caching if used, CDN configuration, and any optimization plugins that may depend on server-specific paths. Forms deserve special attention because a page can look perfect while submissions fail due to mail or SMTP configuration. Submit controlled test forms and confirm that messages arrive where expected. Finally, compare the new website against the test list you created before migration. Have another person review critical pages if possible because a second set of eyes can notice missing images or broken functions you overlooked. Only after the new copy behaves correctly should you prepare the final database synchronization and public DNS change. This testing phase means that when visitors begin reaching the new server, they are reaching an environment that has already been operating successfully rather than one you are testing for the first time.
Step 6: Update DNS Carefully, Monitor Both Servers, and Complete the Cutover
When testing is complete, the new server is ready, and the latest dynamic data has been synchronized, you can begin the public cutover. First, take one more backup of the source website and note the exact time of the final synchronization. If the site receives frequent database changes, follow the synchronization strategy you prepared earlier so new orders, registrations, comments, submissions, or other important records are not left behind. Next, change only the DNS records required for the migration. In many cases, that means updating the root domain and www records to the new server while leaving unrelated MX and other service records unchanged. Some migrations involve changing nameservers instead of individual records, but switching nameservers recreates responsibility for the entire DNS zone, so make certain every required record exists at the destination before making that change.
DNS updates are not necessarily seen by every network at exactly the same moment because existing cached records may remain valid until their TTL expires. During this transition, some visitors may still reach the old server while others reach the new one. This is the reason you must keep both hosting accounts online during propagation instead of immediately cancelling the source hosting. Monitor both servers, website logs, forms, transactions, error logs, SSL status, and database activity. If your website accepts new user-generated data, pay particular attention to whether any late activity is still reaching the old server. A maintenance or synchronization strategy may be required until traffic has effectively moved.
Test the domain from multiple networks or DNS-checking environments, but remember that seeing the new IP from one location does not prove every resolver has updated. Once the domain reaches the new server, recheck HTTPS, redirects, canonical URLs, robots directives, sitemap accessibility, forms, login, admin pages, images, API calls, scheduled tasks, and email-related behavior. Clear application, server, CDN, and browser caches when appropriate so you are not diagnosing an old cached response. Keep the original hosting account active for a reasonable overlap period—often at least a few days for an ordinary migration—rather than cancelling it as soon as your own computer begins loading the new server.
The exact overlap depends on your DNS setup, application, traffic, billing situation, and risk tolerance. When logs and tests confirm that visitors are consistently using the destination server and no required data remains only on the old host, create a fresh backup of the new production site. You can then begin retiring the old environment. Before cancellation, download anything that might still be needed, including website archives, database exports, mailboxes, configuration records, and logs. Remove old credentials or API access that no longer needs to exist. Finally, update your own documentation with the new server details and backup process. At this point, migration is complete: visitors have been moved from a tested old server to a tested new server through an overlapping transition instead of an abrupt shutdown-and-rebuild process.
Common Website Migration Mistakes to Avoid
Most migration failures come from skipping preparation of from an unusually hard technical problem. One of the mistakes is cancelling the old hosting account too early. Your old server is really your fallback during migration; deleting it before you have confirmed the destination removes the easiest way to recover. Another common mistake is changing DNS before the website has been tested on the server. DNS should be changed near the end of the migration process not at the start. A third mistake is backing up files. Forgetting the database. A WordPress site might show an installation screen or a database error even when every file has been copied correctly if its database was not transferred or if its credentials are wrong. The opposite also happens: someone imports the database. Forgets the uploads folder, themes, plugins or application assets. Email is another source of problems.
Website owners change nameservers recreate the website records and then find that incoming mail has stopped because MX, SPF, DKIM or verification records were missing from the new DNS zone. Document every DNS record before making nameserver changes. Dynamic-data loss can be more serious. Copying an ecommerce database in the morning and changing DNS hours later without another synchronization can leave orders, customer accounts or form entries on the server. Treat constantly changing websites differently from company sites. SSL is another area where beginners sometimes panic. The new server may need the domain to resolve correctly before automatic SSL issuance can finish. Follow the providers certificate process. Check HTTPS immediately after cutover instead of permanently turning off secure redirects. Cache can also create confusion.
Browser cache, WordPress cache, CDN cache, DNS cache and server cache can make an old version appear after the underlying configuration has changed. Clear relevant. Check that the server is really answering the request before assuming the migration failed. Avoid changing many things at once. A hosting migration is not the time to redesign the website replace the theme remove fifteen plugins change DNS providers restructure every URL upgrade the application and change PHP several major versions unless those changes are necessary. Make one controlled infrastructure change stabilize it and then optimize afterward. Finally do not choose the hosting plan only based on storage size or introductory price.
CPU, memory, backup options, support, compatible software, email limits, security, server management renewal costs and upgrade options can matter much as disk capacity. APNClouds hosting selection guide stresses comparing resources and features of relying on a single marketing number. A successful migration therefore has three protections: a verified source backup, a tested destination and enough overlap, between the servers to correct a problem before the old environment disappears.
Website Migration Checklist: What to Verify Before and After Moving
Use a written checklist for every migration even if you have moved websites times before. Repetition builds confidence and confidence can make small settings easy to miss. Before starting the migration write down your domain registrar, DNS provider, current nameservers server IP address, website directory, storage usage, PHP version, databases, email accounts, DNS records, cron jobs, SSL configuration, redirects, plugins or application modules, API integrations and external services. Make a backup and keep a separate copy. Check that the new hosting plan has resources and supports your application.
Create the destination database and required accounts. Set up PHP or other runtime settings. Secure the control-panel credentials. Copy the website files. Import the database without removing anything from the source server. Rebuild email settings, subdomains, cron jobs, redirects, configuration files, environment variables and application dependencies. Preview the destination privately. Test the homepage, pages, navigation, images, downloads, forms, login, registration, search, admin panel, database operations, mobile pages, ecommerce functions if needed, APIs, scheduled tasks and HTTPS behavior. For a website decide how to keep new data created after the first backup from being lost.
Before the cutover make another backup of the source and do the final data synchronization. Confirm which DNS records will change and which must stay the same. After updating DNS do not delete the source account. Monitor both the new servers during the transition. Check that the domain and the www version resolve correctly. Make sure HTTPS works. Verify that redirects behave as expected. Confirm that forms send successfully. Ensure applications can write to the database. Check that emails still function. Make sure visitors do not see any errors. Check logs for problems that're not visible to the eye. Verify your robots settings, canonical links, sitemap, analytics, Search Console configuration, CDN configuration and any other SEO or traffic tools that are part of your website. After traffic has moved successfully create a backup from the destination server and store recovery information securely.
Keep monitoring the website for errors before cancelling the old hosting account. Once the migration has clearly stabilized, download anything you may need from the old account and then close it according to the providers billing procedure. If your current host no longer provides the performance, resources, support or scalability your website needs APNCloud offers website hosting options ranging from shared hosting to VPS-related services. Compare the specifications carefully and choose the environment that fits your workload. The important item, on the entire checklist is simple: do not make the new server public until you have already confirmed the website works there. A migration done in this order gives you the chance of moving the site without visitors noticing the hosting change.
Frequently Asked Questions About Migrating a Website to a New Host
Can I migrate a website to a new host without downtime?
In many normal website migrations, visitors can experience little or no noticeable downtime when the destination server is completely prepared before DNS is changed and the original server remains online during the transition. Absolute zero downtime cannot be guaranteed for every architecture because DNS caching, dynamic databases, application design, and third-party systems can affect the process.
Do I need to transfer my domain to change web hosting?
No. Domain registration and website hosting are separate services. You can normally keep the domain with its existing registrar and point its DNS to a new hosting provider.
Will changing hosting affect my website's SEO?
A properly managed migration where the domain and URLs remain the same should not require changing your content URLs merely because the physical server changed. Avoid extended outages, accidental robots blocking, broken redirects, missing pages, certificate errors, or major simultaneous URL restructuring.
How long does a hosting migration take?
There is no universal timeframe. A small static website may be straightforward, while a large ecommerce store with databases, email, media, integrations, and continuous transactions requires more planning. DNS caches may also update at different times.
Should I delete my website from the old host after copying it?
No. Keep the original website running until the new copy has been thoroughly tested, DNS has been changed, traffic has moved, and you are confident that no required data is being created only on the old system.
Do I need a maintenance page during migration?
Not necessarily for a simple site because the old version can remain live during preparation. A highly dynamic application may benefit from briefly restricting write operations during the final database synchronization to avoid losing transactions or account changes.
What happens to email when I change hosting?
It depends on where email is hosted and which DNS records you change. If mail is provided by a separate service and its MX records remain unchanged, website migration may not need to move email. If the old hosting account also hosts your mailboxes, you must create a separate email migration plan.
Can I migrate WordPress manually?
Yes. A WordPress migration can be performed by moving files, exporting and importing the database, updating database credentials when required, and testing the site on the destination. Hosting migration tools and plugins can also simplify the process, but you should still maintain an independent backup.
Should I move from shared hosting to VPS during migration?
Only when your requirements justify it. A standard website may continue working well on suitable shared hosting, while growing or custom applications may benefit from VPS resources. Review Shared vs VPS Hosting: Which Hosting Is Right for Your Website? before deciding.
Where should I start if I am ready to move my website?
Begin with the audit and backup steps in this guide, then choose a hosting plan that supports your current software and expected workload. If you are considering a new hosting environment, you can review APN Cloud hosting solutions and compare the current plans, resources, and features before making your migration decision. Prepare the destination first, test it completely, and change DNS only when the new website is ready to receive real visitors.
Final Thoughts
Migrating a website may look complicated at first, but the process becomes much easier and safer when you follow a clear plan instead of rushing directly into DNS changes. The most important principle when you migrate website to new host is to keep your existing website running while you prepare, copy, configure, and thoroughly test the new hosting environment. Start with a complete backup, document your current server settings, transfer all website files and databases carefully, recreate important email and DNS configurations, and verify every critical function before directing real visitors to the new server. A successful migration is not simply about moving files from one hosting account to another; it is about protecting your website data, customer activity, email communication, search visibility, security, and overall website performance throughout the transition.
This becomes especially important for business websites, ecommerce stores, membership platforms, and other applications that continuously receive new orders, registrations, enquiries, or database updates. Keeping both the old and new servers active during the DNS transition gives you an additional layer of protection because visitors using cached DNS information can still access the old website while other users begin reaching the new server. You should also avoid cancelling your old website hosting account immediately after the migration. Instead, continue monitoring the new environment for several days, check server and application logs, test SSL, email, forms, payment or API integrations where applicable, and create a fresh backup once you are confident that everything is operating correctly.
The migration process is also a good opportunity to reconsider whether your current type of hosting still matches your website's requirements. A small blog or company website may work perfectly on well-configured shared hosting, while a growing application with heavier traffic or greater resource requirements may need more scalable hosting plans or VPS resources. Rather than choosing a new hosting provider based only on price or storage, compare the complete environment, including CPU and memory resources, server technology, backup options, SSL, security, control-panel usability, technical support, upgrade possibilities, and the requirements of your website software.
If you are looking for a new hosting environment, you can explore APNCloud hosting solutions and compare the available options according to your website's current needs and future growth. The safest approach is always to choose the right hosting plan first, prepare the destination server completely, test the migrated website privately, synchronize the latest data, and only then update DNS. Never rely on the assumption that a migration worked simply because the homepage opens—test your forms, database, login system, important pages, email, HTTPS, redirects, scheduled tasks, and other essential functions as well. With careful preparation, reliable backups, proper testing, and a controlled DNS cutover, moving to a different host does not need to become a stressful event. Instead, it can be a planned upgrade that gives your website a more suitable foundation for future traffic, content, customers, and business growth while keeping disruption to visitors as low as reasonably possible.
Keep reading
Related articles
VPS Hosting for WordPress: Is It Better Than Shared Hosting?
Discover whether VPS hosting for WordPress is better than shared hosting. Compare speed, security, costs, scalability, and features to choose wisely.

How to Choose the Right VPS Hosting Plan for Your Website
Learn how to choose VPS hosting for your website. Compare CPU, RAM, storage, managed plans, security, pricing, and scalability before you buy.

How Much RAM Do You Need for a VPS Server? Complete Guide
Understand VPS RAM requirements and learn how much memory your server needs. Compare 1GB to 16GB VPS plans, improve performance, and choose the right RAM.
Never miss a post
Fresh guides, product updates and hosting resources from the APN Cloud team.